


Day 1: Kolkata to Dehradun – A Rough Start but Made It
It’s been a while since I was actually able to finish a trek. It’s not that I wasn’t fit enough, but because of bad weather and some other travel plans, I couldn’t really do a proper trek in 2025. We had planned a couple of treks at the beginning of the year—Pancha Chulli Base Camp and Kedartal—but both had to be cancelled due to bad monsoon conditions and harsh weather.
By the end of the year, we planned for the Kanchenjunga Base Camp trek. That one also didn’t go well. We had to come back from the middle of the trek because of some issues on the route. So overall, 2025 didn’t really give me a proper trekking closure.
Because of that, in 2026, I decided to keep things light. Initially, we planned for Dayara Bugyal. Technically, this is my first winter trek. But then again, in 2023, during the Rupin Pass trek, we faced really bad weather and heavy snowfall, so I already had some experience of snow trekking from there. You could say this is my second snow trek.
The Journey Begins (Kolkata → Delhi → Dehradun)
We started from Kolkata airport. The flight was scheduled for 6 PM. The plan was simple—fly to Delhi, catch a train from Delhi to Dehradun, and complete the overnight journey so that we wouldn’t lose an entire day just travelling.
But the journey didn’t start smoothly.
The flight got delayed. Initially, it was scheduled for 6 PM, but Indigo being Indigo, they started delaying it. Lately, they’ve been doing this with a lot of flights. I’m not sure if it was because of operational issues or weather conditions in Delhi, but eventually the flight got rescheduled to 7:45 PM.
That was really bad news for us.
Our train from Delhi was scheduled at 11:45 PM. Reaching Delhi at around 9:30–9:35 PM, collecting baggage, and then rushing to the station was going to be very hectic. Still, we decided to try.
We landed at Delhi airport around 9:35 PM. By around 10:30, we finally had our baggage. We tried booking an Uber, but there were no Ubers available at that point, which was extremely frustrating. Somehow, we managed to get an inDrive cab.
We reached Old Delhi station at around 11:30 PM. We still had roughly 15 minutes in hand. Just enough. We boarded the train, and honestly, that was a big relief.
The train was supposed to reach Dehradun at 5:55 AM, but we reached a bit earlier, around 5:45 AM.
Dehradun → Natin Village
Some of our team members—like Dr. Soumitra Ghosh (Soumitra da) and a few others—had already reached Dehradun the previous evening and stayed at a hotel. We went there, took a bath, freshened up, and by around 7:30 AM, we started our journey towards the mountains.
The initial plan was to stay at Raithal village. But our trek lead decided to move a little further, so instead, we headed towards Natin village. We started from Dehradun at around 8 AM.
We stopped a few times on the way for breakfast, lunch, and some snacks. The journey itself was quite good. The roads were in great condition, and there weren’t many landslides or bad patches. Compared to many Uttarakhand journeys I’ve done before, this one felt smooth.
We finally reached Natin village around 7:30 PM.
We had our dinner, got settled for the night, and that was it. Day one came to an end.
That was my Day 1 of the Dayara Bugyal trek.
Day 2: Natin Village to Chilapada Campsite
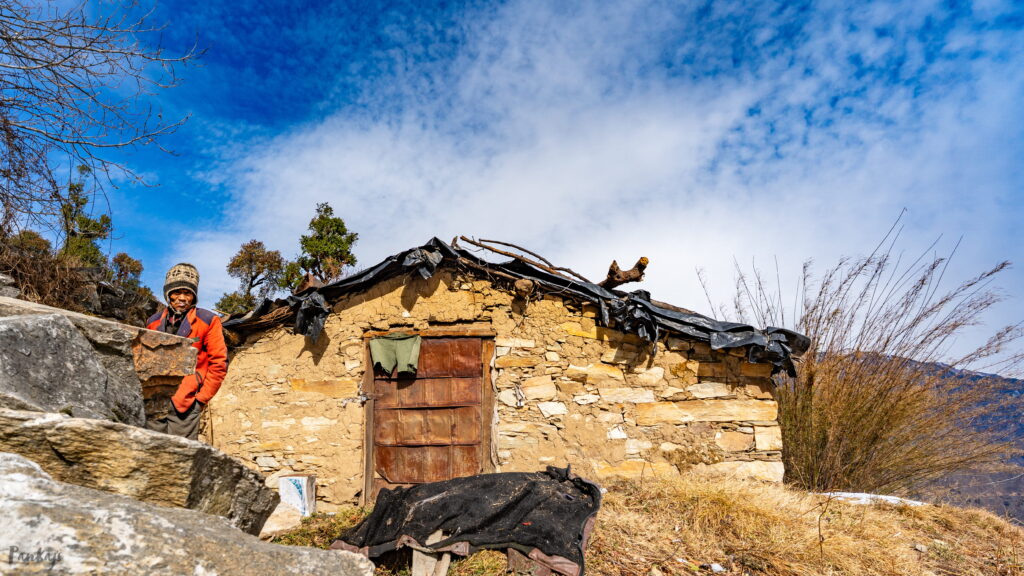
On the 25th of January, we started from Natin village at around 10 o’clock in the morning. We woke up early, had our breakfast and tea, and honestly, we were feeling really refreshed. The homestay we stayed in at Natin village was great. The room was clean, and they provided clean blankets, which was a big relief considering the temperature was hovering around 1–2 degrees Celsius.
We started walking at around 10 AM towards the Dayara Bugyal side. Usually, most people stay at the Gui campsite, but we decided to stay at the Chilapada campsite instead. The main reason for this is the water source. The water source at Chilapada is much cleaner compared to Gui. This is not something many people know, which is why most trekkers end up staying at Gui. But those who know about it usually try to stay at Chilapada.

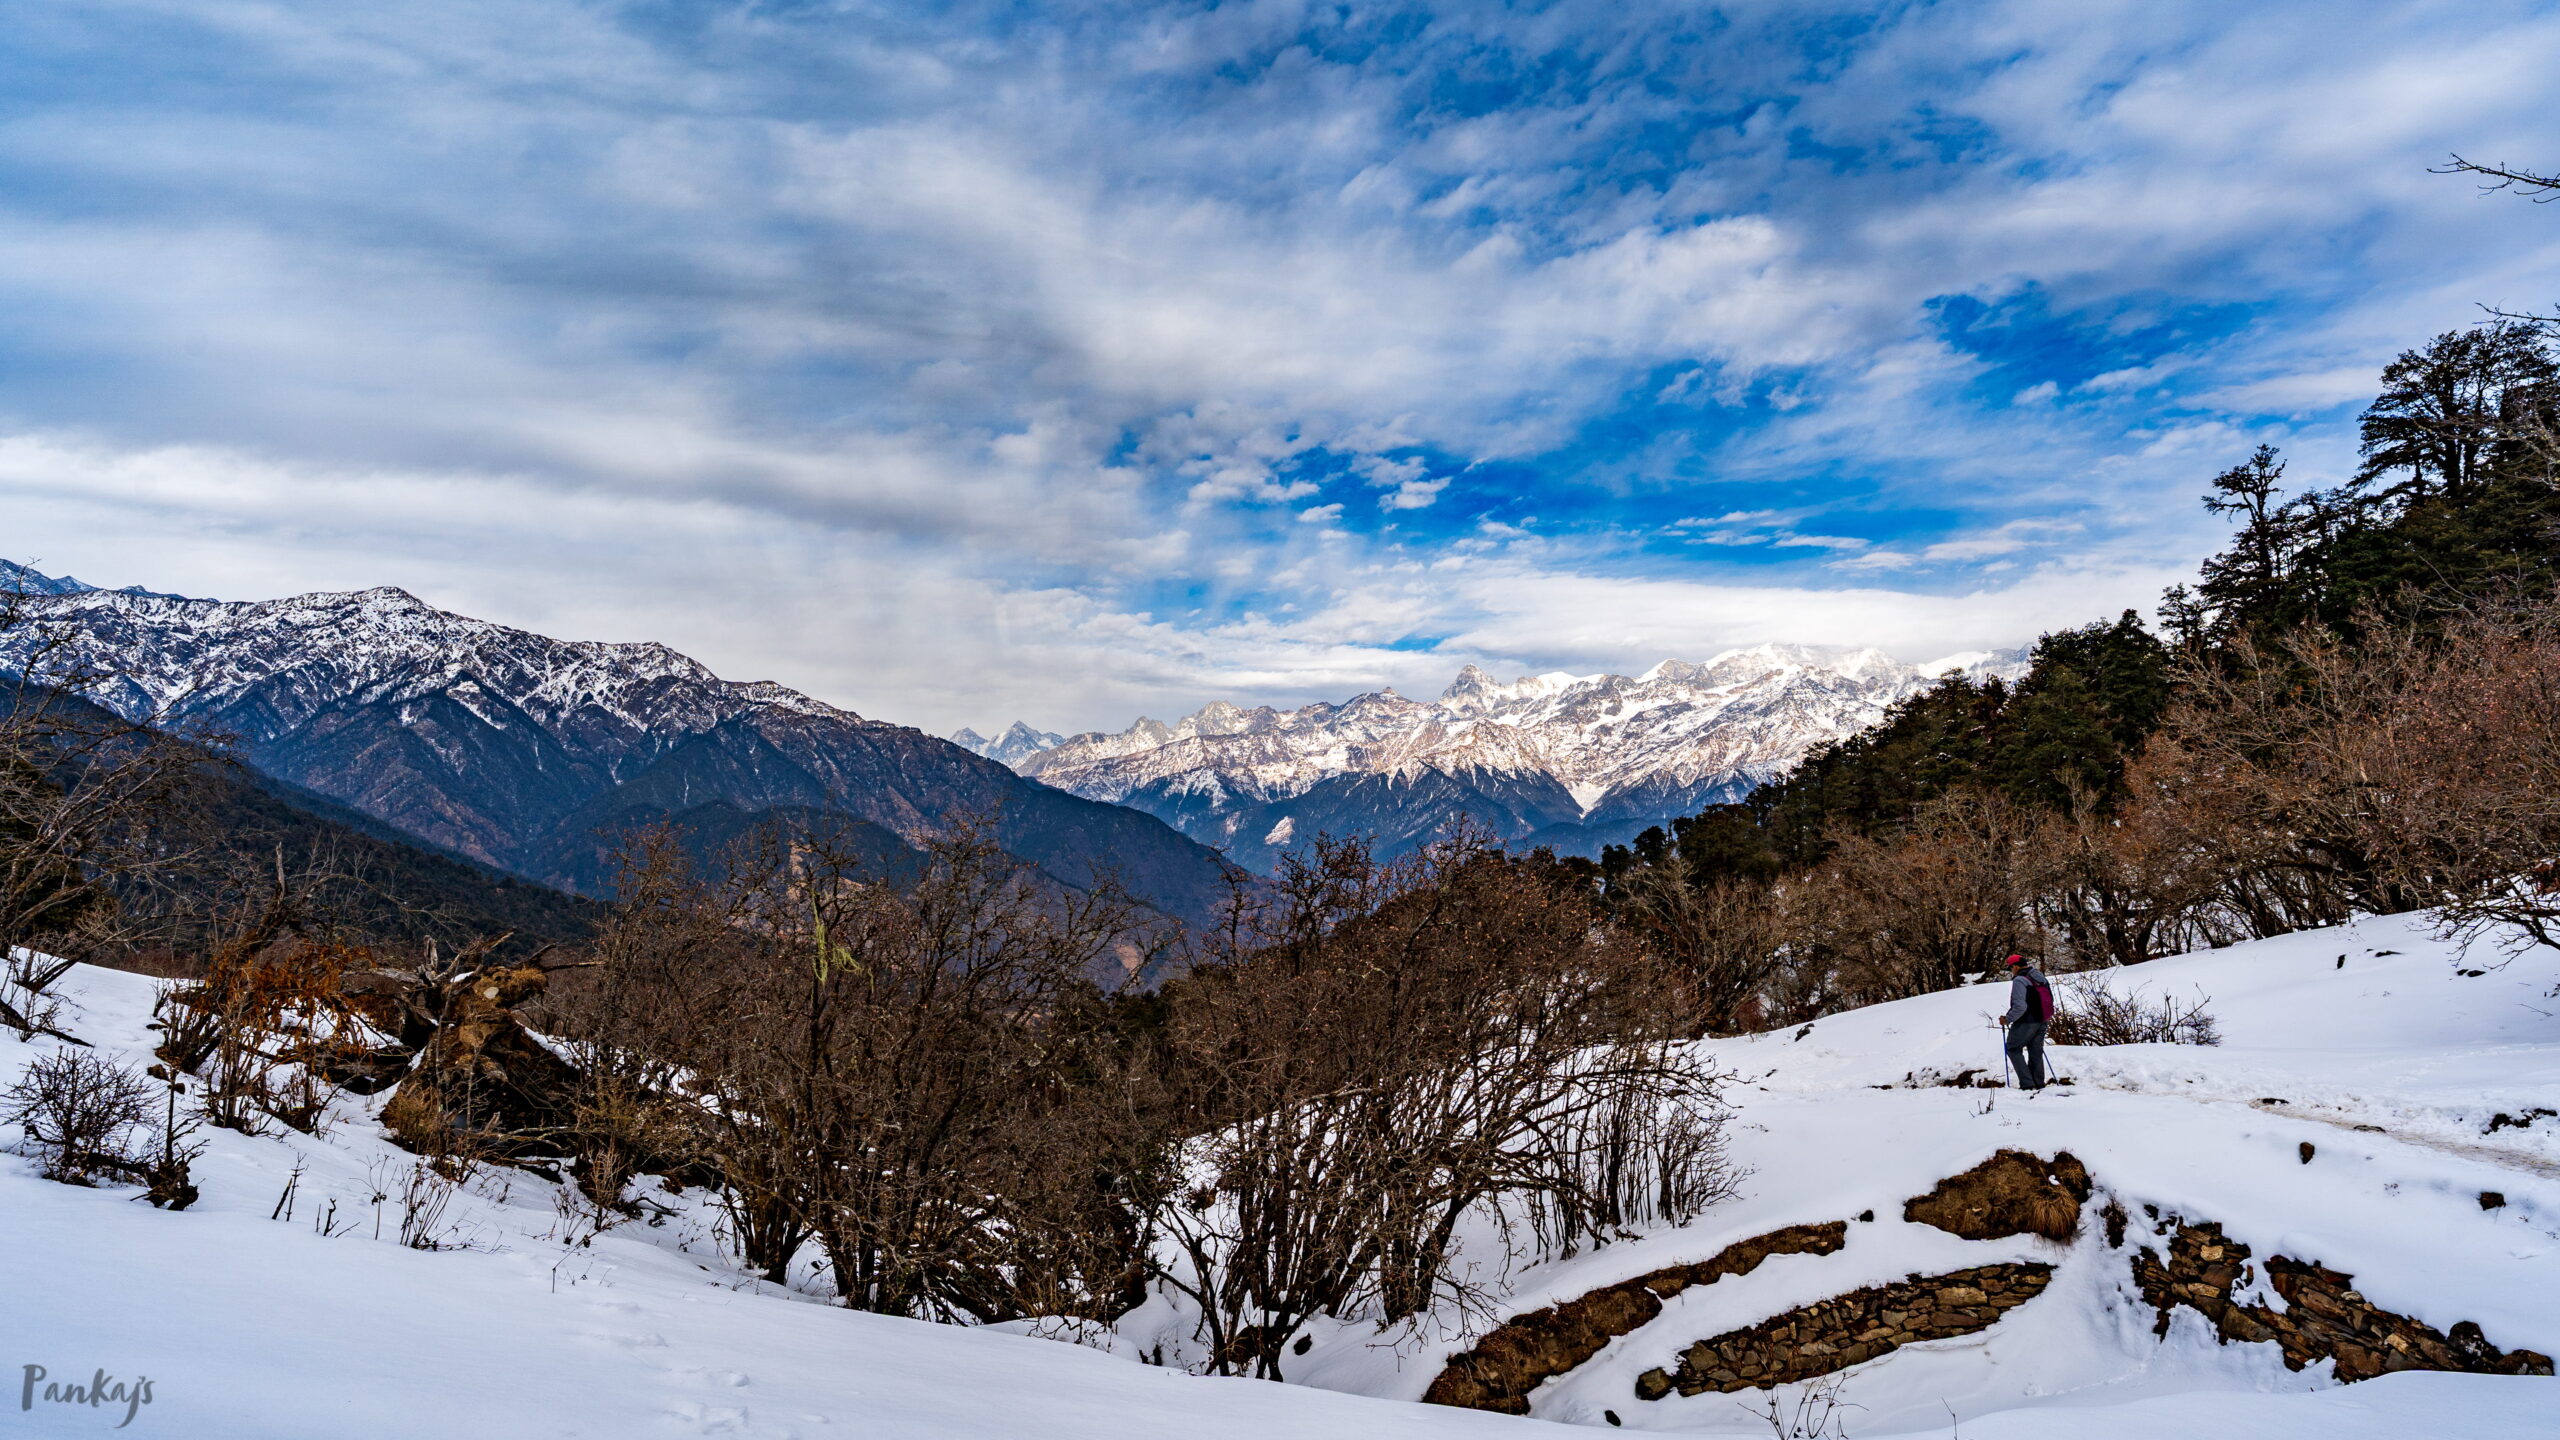
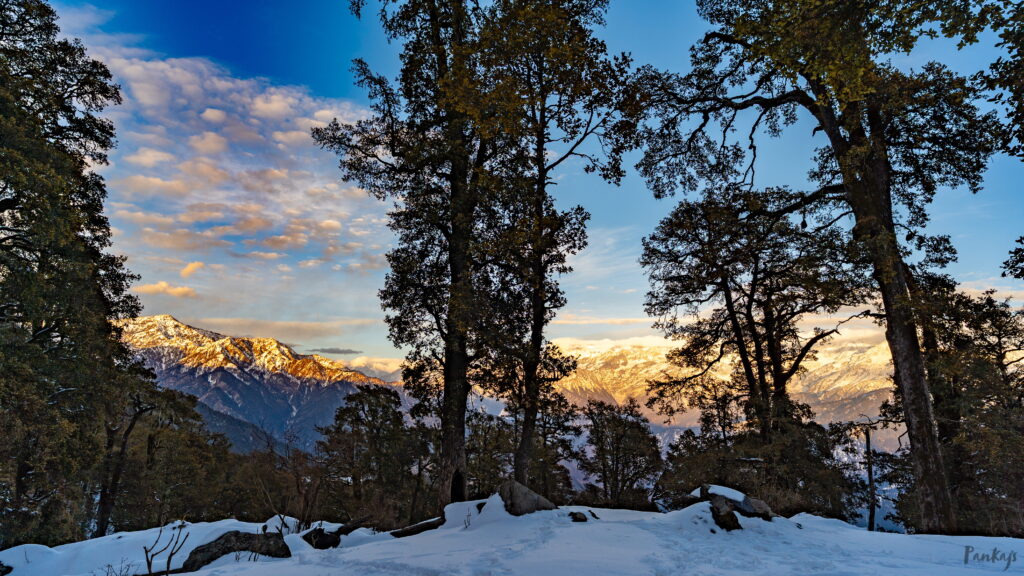
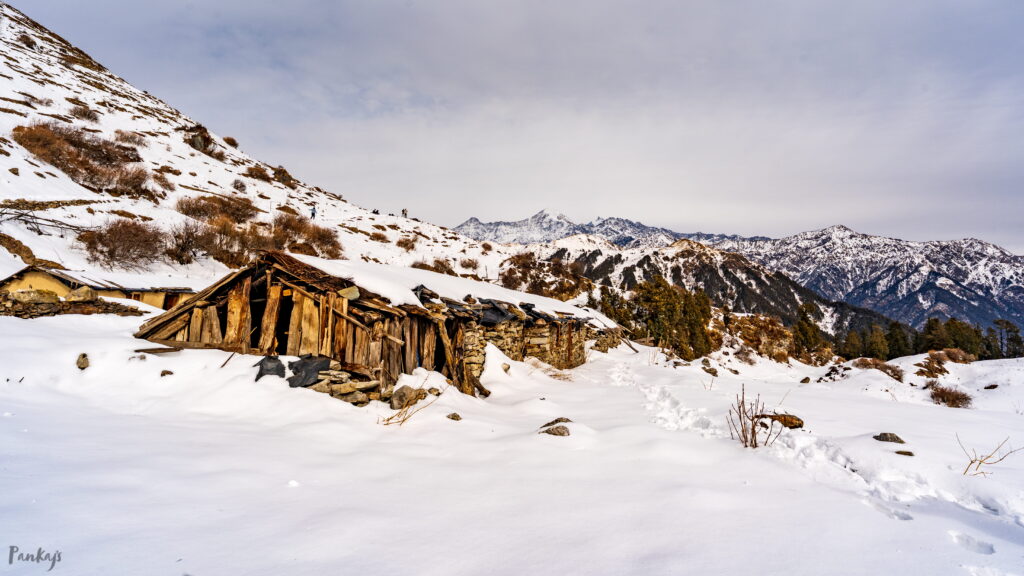
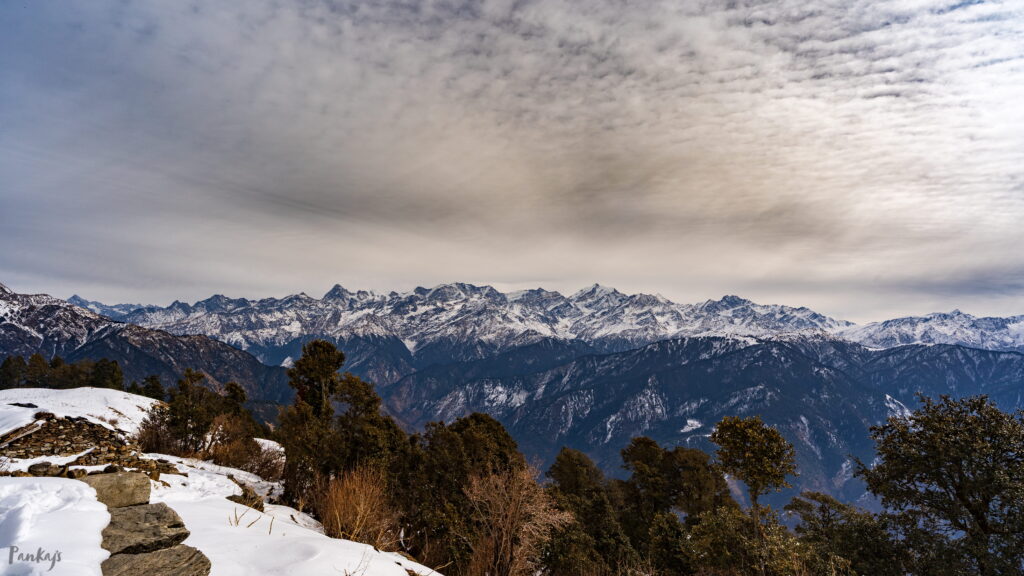
The main difference between Gui and Chilapada is the setting. Gui is located in an open ground, so from the campsite itself, you get a vast view of the Garhwal Himalayan range. Chilapada, on the other hand, is surrounded by trees. You still get to see the Garhwal Himalayas, but parts of the range are hidden because of the trees. That was completely fine for us, because anyway, once you reach the Dayara Bugyal top, you get a clear and wide view of the entire mountain range.
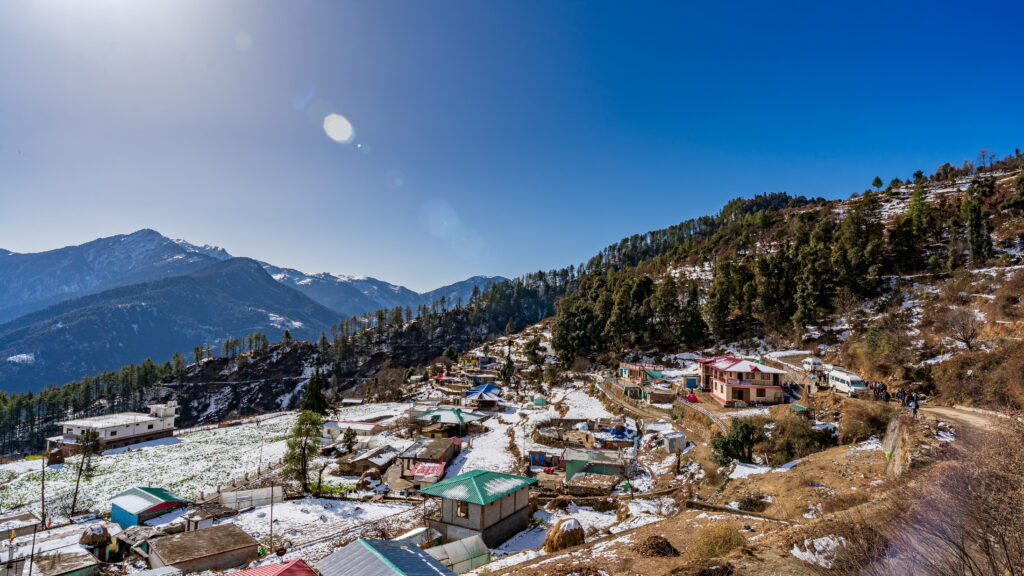
So we started walking. Just after starting, you’ll find a really nice helipad near Natin village. It actually looks quite good. We stopped there for a bit, took a few photos, and then continued walking through the village towards the Bugyal.
At the very beginning of the trek, you face a steep climb. First, you cross the village, and the trail there is not very good. It’s a standard village trail, a bit rough, and you’ll probably struggle a little. This is also the phase where most people feel the trek is hardest. In almost any trek, the first 15–20 minutes, or even the first 30 minutes, feel the toughest. Your body is just getting into rhythm.
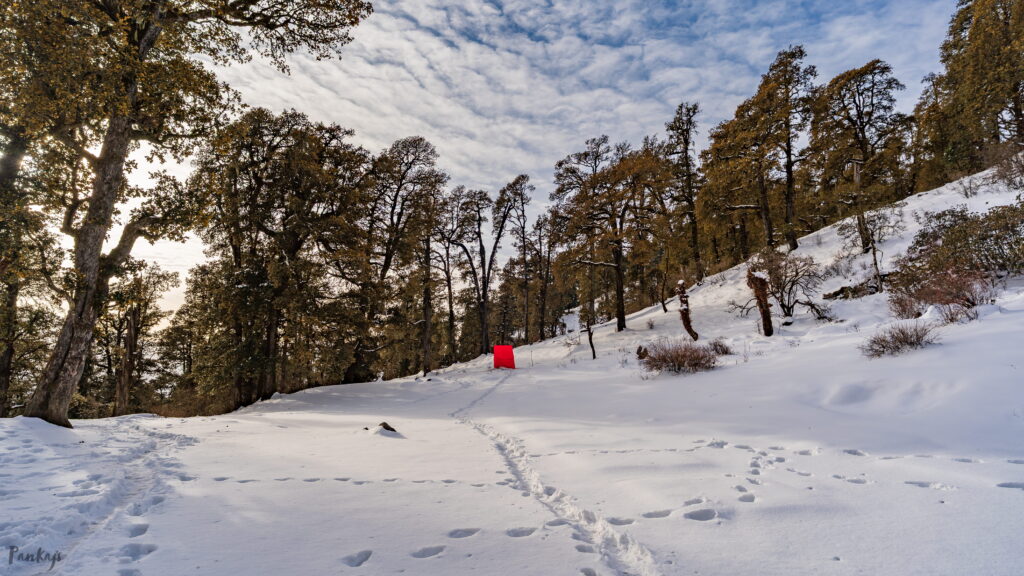
After crossing the village, you start entering the forest. First, there’s a maple tree forest, followed by rhododendron forest, and then gradually you move towards the campsite. Interestingly, we started getting snow almost from the beginning. Once we crossed the village, there were patches of snow, and as we climbed higher, the snow kept increasing.
Initially, we didn’t put on our microspikes. But before reaching the Gui campsite, the snow started getting harsher, and it became difficult to walk without proper grip. So near the Gui campsite, we finally put on our microspikes.
It took us about five and a half hours to reach the Gui campsite. At Gui, we had our packed lunch and took a break of around 30–40 minutes. We also had some warm tea there before starting again towards the Chilapada campsite.
At Gui campsite, you’ll find not one, but a couple of local people who have set up fixed stalls. You can buy chocolates, cookies, biscuits, cakes, mineral water, and also get warm food and tea. That’s definitely a plus point of Gui. But at the same time, it feels quite crowded, and that was another reason we were happy about choosing Chilapada instead.
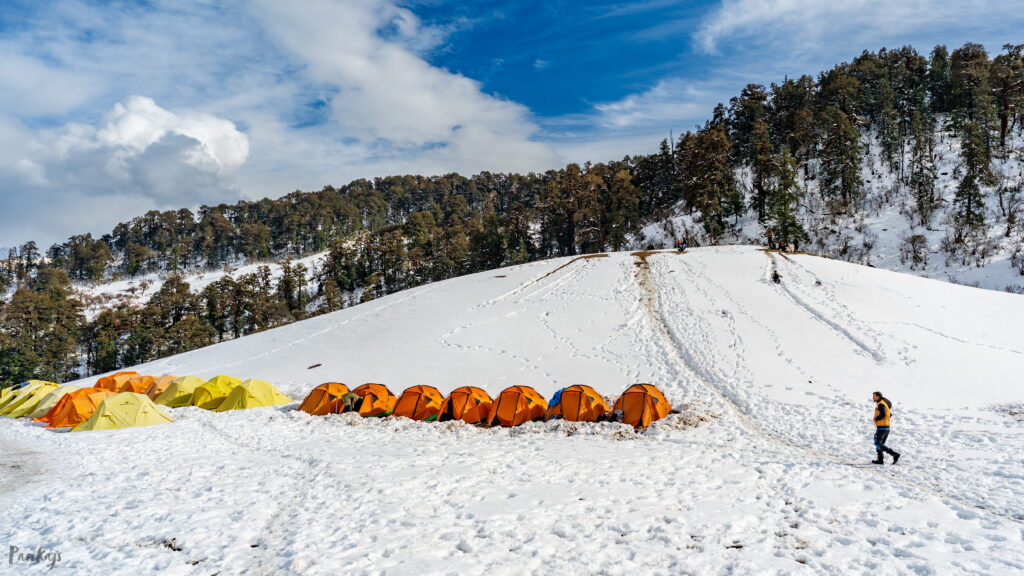
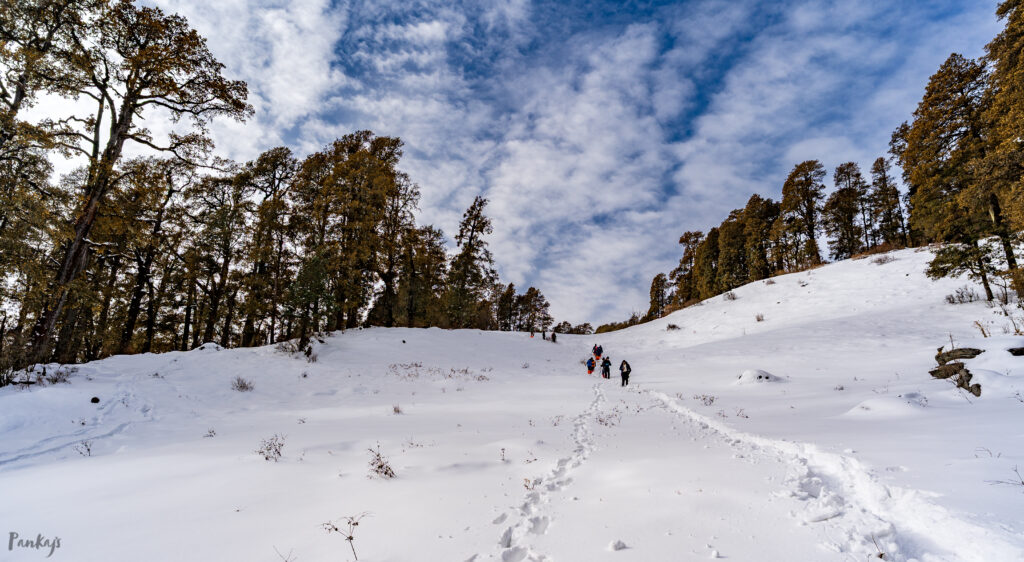
From Gui campsite to Chilapada, it took us another two hours approximately. This section is tough. There’s a lot of snow, the climb is steep, and it really tests your energy. But once you finish that climb and finally see the Chilapada campsite, it feels worth it.
The campsite itself is beautifully located, surrounded by trees, and there’s a very good-quality water source nearby. Reaching there felt refreshing, but the temperature was really harsh. By the time we reached the campsite, it was already around 5:30 in the evening. The sun was about to set, and the temperature was around minus 2 or minus 3 degrees Celsius.
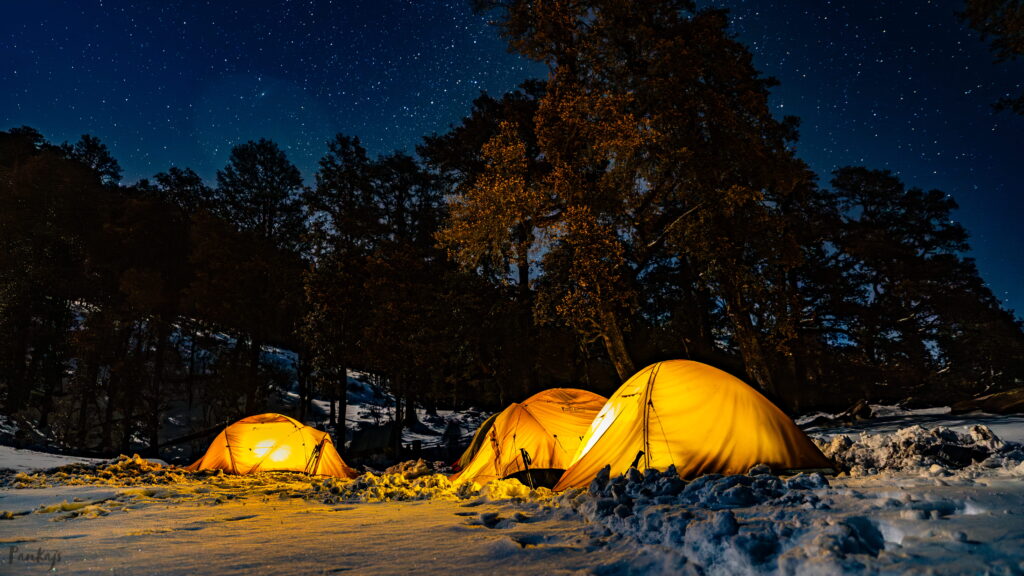
We had to get settled very quickly into the tents. As the night progressed, the temperature dropped even further. It must have gone down to around minus 10 or minus 12 degrees. Inside my tent, my Casio watch showed around minus 3.5 degrees, so outside the tent it must have been even colder.
We settled in for the night by around 9 PM and went to sleep.
Chilapada campsite is really beautiful. If you are into night photography, this place is excellent. The contrast between the trees, the open sky, and the Garhwal Himalayas in the background makes it a great spot for photos, as you can probably see in my pictures.
One important thing to note: on the way to Chilapada campsite, you’ll find a couple of water sources—maybe three or four in total. Still, I would strongly suggest carrying enough water from Raithal or Natin, wherever you are starting from. At least two litres of water is a good idea for this trek.
Overall, reaching Chilapada was a really good experience, even though it was physically demanding and very cold.
Day 3: Dayara Bugyal Top and Back to the Village (D-Day)
Day three was our D-Day. We were mentally prepared to finish the Dayara Bugyal trek on this day. But there were a few problems that had already started the previous evening when we reached Chilapada.
Most of the trekkers in our team were beginners, and for many of them, this was their first-ever trek. Even though Dayara Bugyal is usually considered a beginner trek, during winter it becomes a little more challenging because of the snow. Walking on snow needs extra attention. You slip, you fall a couple of times, and that is totally normal. But for beginners, those falls really break confidence.
Because of this, two members from our team decided not to continue the trek.
The night at Chilapada was also extremely harsh. The temperature was really, really low. We slept inside our sleeping bags wearing thermals, fleece, and even our down jackets, but still it was not enough. It was cold throughout the night. I used a couple of Decathlon body warmers, and they helped for a few hours, but once the warmth faded, it was cold again.
Since those two members had to go back to Natin village the next day, we had to re-plan the trek. On top of that, the weather forecast was not encouraging. There was a heavy snowfall warning from the government, and I personally received a text alert during the trek. So we decided to finish the trek on this day itself and descend all the way back to Natin.
Technically, this meant covering almost two days’ distance in a single day.
Starting the Summit Push
We started from the Chilapada campsite at around 9 o’clock in the morning after having a light breakfast. I had dalia. There was poha as well, but I don’t really like poha that much, so dalia worked fine for me.
We were fully geared up. Microspikes, gaiters, everything was on. And then we started walking towards Dayara Bugyal.
The first challenge came immediately. Chilapada campsite is on slightly higher ground, so you first have to descend around 200 meters from the campsite. It’s a steep descent. Since we were the only group staying at Chilapada, there was no trail already made. We had to walk through almost 1.5 to 2 feet of fresh snow and create our own trail.
Honestly, I enjoyed this part a lot. Walking down through untouched snow was tiring but very satisfying.
From there, we started climbing towards Dayara Bugyal. The initial part of the trail is relatively easy, but after that, there are a couple of steep sections. In winter, if you are not using microspikes here, it becomes extremely difficult. So if you are doing Dayara Bugyal in winter, microspikes are a must, especially from Gui or Chilapada onwards.
We reached the Dayara Bugyal top at around 10:45 AM. It took us roughly 1 hour and 45 minutes from Chilapada to reach the top.
Republic Day at the Top
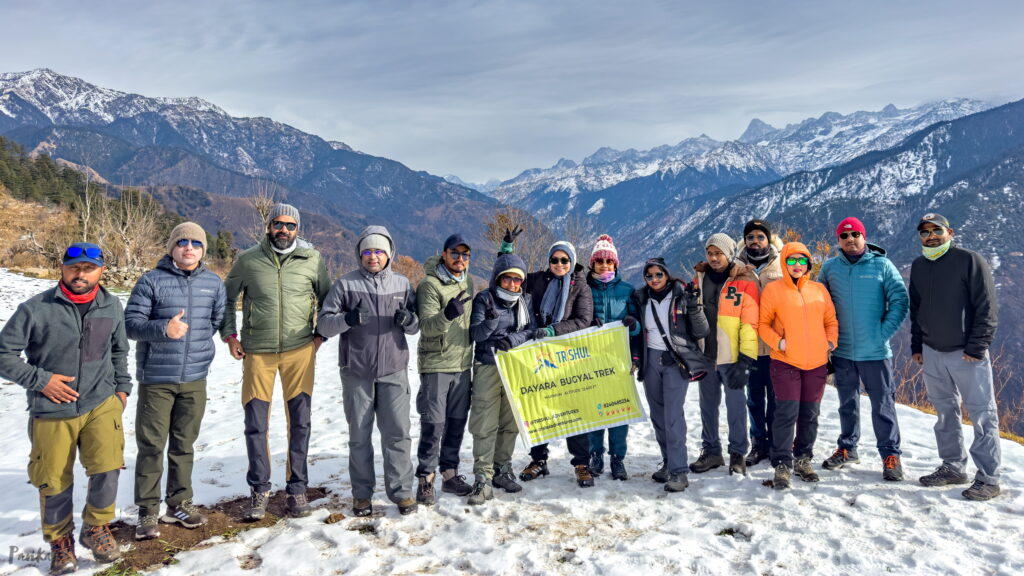
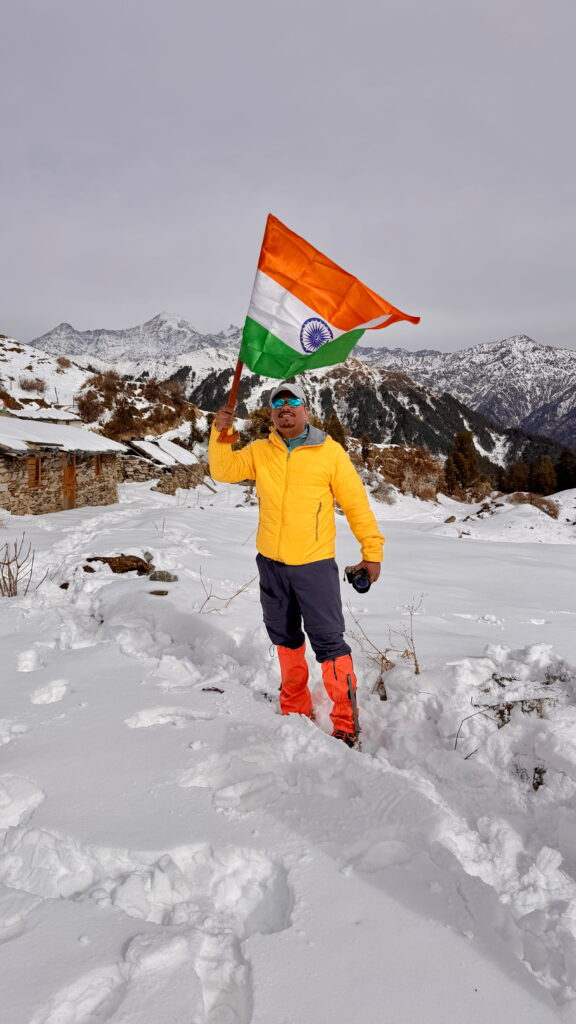
We spent good quality time at the top. It was the 26th of January, Republic Day. Some of the team members had carried the Indian flag. We took photos with the flag and celebrated Republic Day right there at Dayara Bugyal.
After that, there was a long photo session. We walked further into the open Bugyal meadows, completely covered in snow. The entire place looked beautiful, calm, and white. We took more photos and just soaked in the moment.
At around 11:45 AM, we started our descent back towards Chilapada.
Long Descent Back to the Village
Once we reached Chilapada, we had our lunch there. After lunch, we started descending all the way down towards Natin village.
The descent was tough. Climbing up is one thing, but climbing down really tests your legs. On snow, it becomes even more difficult. You slip, you lose balance, and sometimes you fall.
Some people, like Soumitra da and a few others, were not using microspikes during the descent. They slipped and fell a couple of times. We laughed, helped each other up, got steady again, and continued walking. It was tiring, but the mood was light.
It was a long walk. We finally reached the village around 5:30 in the evening, maybe closer to 6 PM.
The homestay owners welcomed us with a warm cup of tea. That moment felt really good.
We were genuinely happy and joyful that we were able to finish the trek.
Dayara Bugyal Winter Trek – Quick Tips (From My Experience)
I’m adding this section mainly for people who are planning this trek and also for those who are searching for itinerary and winter conditions. These are purely based on my experience.
Best Time to Do Dayara Bugyal in Winter
If you are planning to do Dayara Bugyal in winter, I would strongly suggest doing it before the end of January. After January, the snow becomes really harsh, especially if you are a beginner. During January itself, the snow is already challenging, but still manageable with the right gear and pacing.
Is Dayara Bugyal Good for Beginners in Snow?
Yes, Dayara Bugyal is considered a beginner-friendly trek, but winter changes everything. Snow makes walking slower and more tiring. You will slip and fall a couple of times, and that is completely normal. For beginners, this can affect confidence, so mental preparation is equally important.
Microspikes Are Not Optional in Winter
One very important suggestion: do not depend on the trekking company for microspikes. If you are planning to trek regularly, even one or two treks every year, just buy your own microspikes or crampons. You can get decent ones from Decathlon or similar brands. They usually cost somewhere around ₹1,000–₹2,000, but they save a lot of energy and make the trek much safer.
I carried my own microspikes, and it made a huge difference, especially on steep snow-covered sections.
Temperature at Chilapada Campsite
At night, the temperature at Chilapada campsite can easily go down to minus 10 to minus 12 degrees Celsius. Be mentally and physically prepared for that kind of cold. Make sure you ask your trekking company about the quality of sleeping bags they provide. In our case, the sleeping bags were not great, and the night felt extremely cold despite wearing multiple layers.
If possible, carry extra insulation like body warmers or a proper winter-rated jacket.
Network Availability on Dayara Bugyal Trek
Network connectivity on this trek is surprisingly decent. Up to the Gui campsite, you will mostly get 4G network. Data speeds are slow, but calls work fine. At Chilapada campsite, you may get just one bar of signal, but it is usually enough to make calls and inform family members.
At the Dayara Bugyal top, network connectivity is very strong. I was honestly surprised to see stable 4G and even 5G signals there. Video calls were possible without much trouble.